

- GTA V Chop Guide - January 8, 2023
- Pegassi Infernus Guide - January 6, 2023
- Dinka Blista Kanjo Guide - January 6, 2023
Grand Theft Auto V‘s antagonists are a different breed of villains who hold enormous amounts of power and double-cross you in unexpected ways. In a world where the antagonists are criminals, and the protagonists aren’t all that innocent either, clashes between the two parties take place over lesser concepts of revenge and self-interest, as opposed to a fight between “good and evil.” After all, an antagonist is simply someone who opposes the protagonist, regardless of motivation.
In Grand Theft Auto, antagonists usually don’t come at you guns blazing, trying to wrap it up as soon as possible. Knowing that you are a criminal to some degree with your own power, they make their move subtly throughout the story, slowly building up to a climax.
Sometimes they move directly against you or against people you know, slowly involving you in their entire fiasco. One such prominent antagonist that comes to mind is the character we’re going to cover in this Martin Madrazo guide.
Martin Madrazo Overview
Martin Madrazo is the leader of an American-Mexican Drug Cartel, although he likes to keep up the facade of being a rich and law-abiding citizen. Being the head of the Madrazo household, while he trusts his son Miguel very much to the point of having him as his personal bodyguard, he abuses his wife Patricia and disregards loyalty by flirting and sleeping with other women.
Martin is just as psychopathic of a cartel leader as he is a husband and is often plagued by the tendency to put others in their place through any means necessary. With that said, he treats his enemies even worse and goes to great lengths to make sure they suffer if they double cross him, regardless of family relation.
This is clearly evident from the Caida Libre mission, where he has Michael de Santa assassinate Javier Madrazo, his cousin, for attempting to testify against him.
Speaking of testimony, the only reason Martin Madrazo has been above the law, despite several allegations, is because he bribes the witnesses into going silent and backing out. However, in the event that a witness rejects his bribe, Javier being the prime example, he simply has them killed in a framed accident – truly terrifying.
On GTA Online, though, Martin is completely out of character as a job-giving NPC who treats you amicably and considers you a friend. As such, aside from this side of his, the scope of this guide will be mostly focused on his role in the main Single player storyline with reference to the exact GTA missions he gets featured in.
GTA V Main Storyline Martin Madrazo’s Introduction
Unexpected Yet Expected
Martin Madrazo was first introduced in the Marriage Counseling mission, which, although unexpected, I saw it coming. This is because we have all seen Michael feel conflicted about his life choices since the beginning of the game.
In a nutshell, he escaped his criminal life to start a family, something he had always wanted to do – he married a woman named Amanda and had two kids, Jimmy and Tracey.
However, as time went on, he began lamenting his simple, boring life and wished to set out to fulfill his ambitions. He became more and more distant from his family by cheating on his wife, dismissing his son, and belittling his daughter’s dreams. At this point, all that was needed was a nudge to throw him back into the criminal life, and that came from none other than Martin Madrazo.
The Nudge
The nudge came as a coincidence one fine day when Michael came home earlier than usual, only to find two tennis rackets at the door. Knowing that he had hired a tennis coach (Kyle Chavis) for his wife, he had expected to see them playing tennis at the time – what else could they be doing? That’s when it instantly clicked in him, and he rushes inside to confirm his suspicions of being cheated on (not that he’s any less guilty).
Michael erupts in anger and is hellbent on killing Kyle, who, in order to save his own skin, jumps out of the window and makes a run for it in his car. All while this is happening, Franklin Clinton pulls up outside of Michael’s house in his motorcycle, hoping to check up on his friend.
Even so, his timing couldn’t have been any better as all Michael has to do is say, “She f***ed a prick in my bed,” and the next thing I know, the two are teamed up, determined to chase down Kyle.
Collapsing The Deck

Kyle, having gotten a headstart in the chase sequence, is quick to put some distance between himself and the duo. But he can’t keep running forever and has to stop somewhere eventually. As such, after driving up Rockford Hills, Michael and Franklin find Kyle’s car parked outside a lavish deck, with Kyle standing at the top trying to explain the situation. At this point, though, Michael wasn’t having any of it and hastily decided to pull the entire deck if Kyle planned on hiding up there for the rest of the day.
After telling Franklin to tie a winch to one of the structure’s integral supports, Michael stepped on the gas and began slowly pulling apart the massive deck – it didn’t take long for it to fall apart. It’s important to note that Kyle did anticipate this happening and evacuated the building before it came crashing down – this is to address misconceptions that say Kyle died in the incident.
Martin Madrazo Pulls Up
After making his triumphant exit, Michael gets an emergency call from Kyle, exclaiming that the deck wasn’t his. As he explains that a regular tennis coach couldn’t possibly own something that expensive, the woman seen at the top of the deck interrupts the call and warns Michael about what he’s done.
This is the first time Martin Madrazo’s mention is made, as the woman turns out to be his mistress and the legitimate owner of that deck. Perhaps the only thing weird about this situation is why the mistress let a half-naked tennis coach onto the deck in the first place. My best bet is that they’ve definitely been in some kind of relationship before – strangers simply don’t do that.
Martin Madrazo’s men are quick to act, and they catch on Michael’s trail before he even gets home – the duo fight off the henchmen and barely make it back home in one piece. However, before they can bid farewell to the entire predicament, Martin Madrazo and his mistress arrive at Michael’s house.
Michael’s Debt
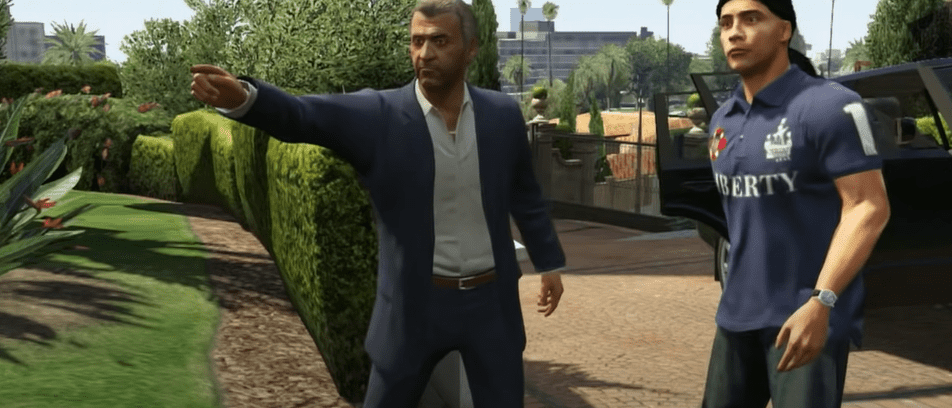
Martin Madrazo immediately comes off as aggressive, all the more because Michael seems to be completely unaware of the man he just crossed. On the other hand, Franklin is tensed up – after all; he dabbles in the underworld from time to time, where Martin Madrazo is particularly famous. On the other hand, Martin also sees some familiarity in Franklin and asks him to introduce the great Martin Madrazo to him – a psychopath at work!
With all the formalities out of the way, Martin shows his true side and smashes Michael with a baseball bat before imposing a heavy debt on him. Martin asks Michael to cover up the costs of his deck, quantifying to somewhere around 2 million dollars – Michael shakily agrees and finds himself in newfound trouble. You know what they say: out of the frying pan into the fire!
Working Under Martin Madrazo
Paying Off The Debts
Having messed with such a powerful figure, Michael is in quite the pinch because refusing to pay off his debts now would mean double-crossing Martin again – that would surely get him killed. On the other hand, dishing out 2.5 million dollars in a short amount of time is legitimately impossible, even if he emptied his savings. As much as he hated to admit it, the only way for him to settle his debts now was to take the illegal approach.
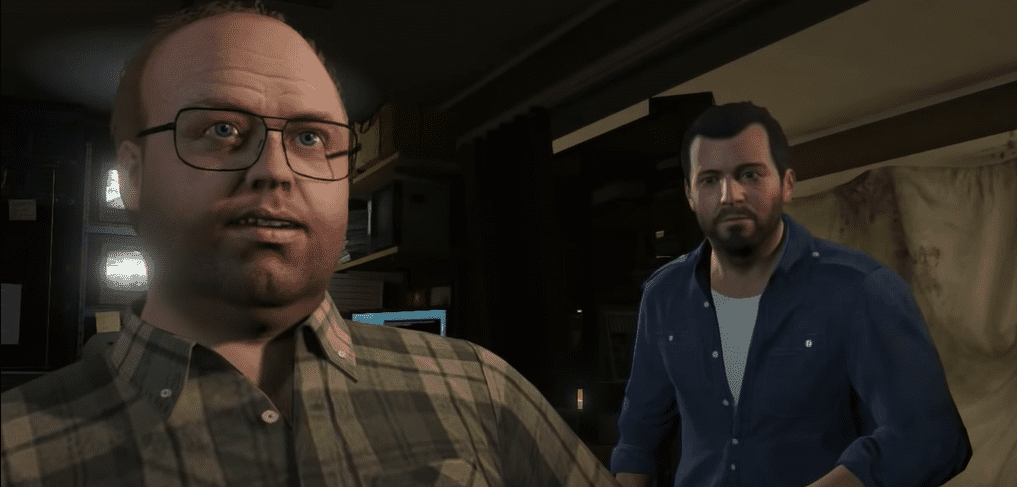
Michael gets in touch with Lester Crest, an old friend of his from his past criminal days, and seeks an opportunity to make at least 2.5 million dollars in one fell swoop. Eventually, after getting Michael to fulfill another mission of his (featured in the Friend Request mission), Lester agrees to help out Michael and sets him up for the storyline’s first heist. I’m talking about Casing the Jewel Store, the first heist mission in the game that settled Martin Madrazo’s debt.
After Michael pays off the reparations, Martin starts to take a liking for the man and begins seeing him in a better light, to the point of entrusting him with a significant job.
Employment: Javier Madrazo
Remember when I talked about Martin silencing anyone who even thought about testifying against him? Turns out that somewhere down the line, his own cousin, Javier Madrazo planned on using some valuable documents that Martin had trusted him against the drug lord himself.
Furthermore, Javier was planning on escaping Los Santos, away from Martin’s clutches, so that he could be exposed, which is a relatively surefire way – Martin had to suppress him before that!
So guess what? Martin calls none other than Michael De Santa to his house in Le Fuente Blanca and entrusts him with the mission to take out Javier. Since it’s a two-man mission, Michael brings along Trevor Philips for the job – although Trevor is not the most likable of characters from Michael’s perspective, his criminal skills are unmatched and most certainly suitable for the job.
It’s important to note that, unlike Michael, who is doing this without expecting to get paid, Trevor, another psychopath, is not the type to shy away when demanding payment for his hard work.
Shooting Down The Plane

Martin’s main plan of action is to shoot down the plane flying Javier to Los Santos International Airport for his departure. This is to be done by means of a heavy machine gun posted at Galileo Observatory – of course, you won’t get a shot at an aerial target any clearer than at an observatory.
From there, the stolen documents are to be recovered and brought back – in case there is no ride available; Martin has gone the extra mile and stationed a black Burrito at the Observatory.
With that said, Michael makes his way to the Observatory while sending Trevor off to trail the plane on his regular ol’ Sanchez, who is perfect for the off-road chase sequence that’s to come. Upon reaching his destination, Michael is greeted by an Observatory explicitly evacuated for him – how kind of Martin!
Not only that, but the heavy machine gun that he uses is state-of-the-art and requires little to no aiming technique. All that Michael has to pull the trigger on the red boxes positioned close to the plane that accounts for relativistic speed.
Thanks to Martin’s fantastic equipment, all it takes is three shots to blow up the plane’s engine, causing it to lose flight and slowly descend in a “May Day” situation.
Recovering the Documents and Some More
With Michael having done his part of the job, the rest is up to Trevor, who is closely following the falling plane’s trail. The chase sequence is intense, with Trevor crossing high-traffic roads, cruising over hills, ducking under bridges, and even leaping over an incoming train just to make sure he doesn’t lose sight of the plane. After all, it’s ideal for him to collect the documents as soon as the plane makes its landing before the relevant authorities arrive at the scene.
As soon as the plane crashes (it doesn’t explode for some reason), Trevor pulls over and finishes off any miserable survivors, including Javier, before making a run for it. On the other hand, Michael disposes of the heavy machinegun he used at the Observatory by loading it up in the Burrito and blowing the two up with a single C4. With all the evidence taken care of, the job seems as good as done – or is it?
Michael receives a phone call from Trevor, who tells him to be at Stoner Cement Works – Michael, confused at what is going on, impatiently waits for Trevor to arrive and give an explanation.
Turns out that when Trevor went to deliver Martin’s files, he ended up bringing up the topic of payment, which angered Martin and spiraled the conversation into an argument and a half. In a nutshell, Trevor cut off Martin’s left ear and fled the premise with a kidnapped Patricia.
The duo must now lay low, avoiding Martin’s all-encompassing sight until either he forgets about them (probably won’t happen) or some kind of negotiation is struck.
Making Peace With Martin Madrazo
The Ancient Artifact

Later down the line, as Michael lays low in Trevor’s trailer and Trevor enjoys quality time with his crush Patricia, a new job hits their doorstep. Featured in the “Derailed” mission, Trevor seizes the opportunity to loot a Merryweather courier service that goes by train.
Furthermore, since it’s operating on land, the chances are high for it to contain bars of gold or high-value antiques. Initially reluctant to take on Merryweather, Michael eventually buys into the idea of scoring big and paying off Martin as part of a negotiation.
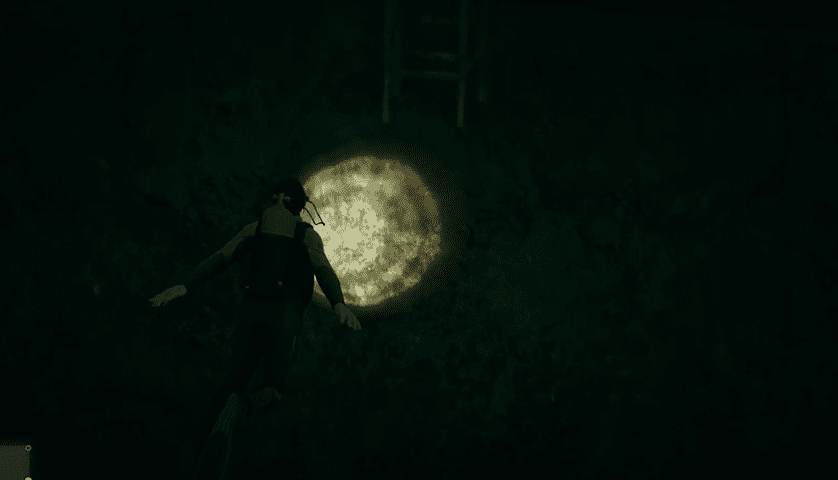
Trevor’s plan of action for the mission works flawlessly – the man may be a psychopath, but he is a criminal genius. The scheme is centered on him hijacking the train and crashing it over the rail bridge above the Alamo Sea, only to spill the contents of the train into the sea below for Michael to collect by boat. Of course, the risky part involves Trevor jumping off from the bridge into the sea below to regroup with Michael.
Regardless, after looting a high-value briefcase, the duo flee the scene with Merryweather security on their back – as always, Michael drives while Trevor shoots all the way up to their rendezvous point. By the time they reach their destination, the two split up and dispersed, with Michael keeping the briefcase and the ancient artifact in it.
The Negotiation
Remembering the collection of artifacts from Martin’s house at La Fuente Blanca, Michael infers that Martin is fond of them and values them much more than money as far as bargaining chips go. Although risky to make contact with the man hunting him down, if Michael’s theory is right, handing over Merryweather’s ancient artifact along with Patricia should get Martin off his back for good.
Martin makes the negotiation offer as soon as possible and hears back on it relatively quickly at the end of the “Monkey Business” mission. After “saving the world” with the FBI (not going to explain), Michael is greeted with the good news that Martin has accepted his offer and will leave the two alone afterward.
As such, Trevor drives Patricia back to Martin’s house, where Martin is standing to receive his wife with a rose in his hand. Even Patricia completely dismisses him and darts into the house, with Trevor seeing her off every inch of the way.
The best part, however, is that, before leaving, Trevor seriously warns Martin against abusing his wonderful wife, in response to which Martin frightfully gives his affirmation. Guess it takes a psychopath to know another, am I right?
From here on out, Martin Madrazo is never heard from again, and his role in GTA V’s main storyline comes to a humorous end.
GTA Online
Madrazo Dispatch Services

Martin Madrazo’s Dispatch Services are exactly what they sound like – quickly administered contract missions where the objective is to assassinate a certain target. Of course, this target is guarded, so you can either go in guns blazing and take the risk or make stealth your best friend and be done in a flash. It’s important to note that these missions can only be done in groups of two, three, or four – sorry solo players…
Who exactly are these targets, you might ask? My best bet is that, from a storyline point of view, these are some witnesses that, similar to Javier, Martin wants dead before they attempt to expose the drug lord.
Dispatch I
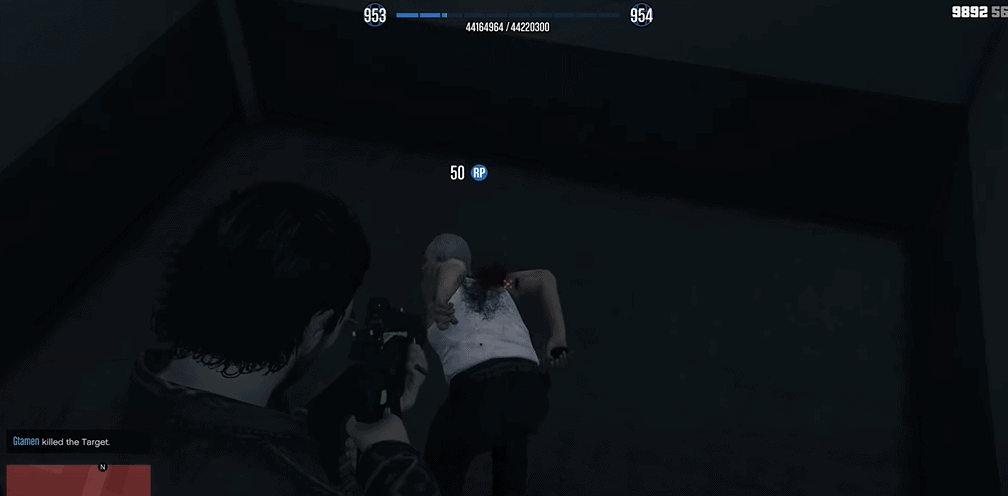
In the DLC’s first dispatch mission, you are tasked with putting an end to one of Martin Madrazo’s close associates. Why? Because he was foolish enough to get caught by the police – before they tortured him into spilling sensitive information, Martin wanted him dead.
The associate is locked up at Mission Row Police Station, and by the time you reach it, you can take two different approaches. Either you go in confidently and fill everyone in sight with lead, including the target, or you can stealthily infiltrate the establishment from a rooftop entrance that Martin lets you in on.
Regardless, once you are done, I would recommend avoiding the SWAT team outside and taking the helicopter to the rooftop to lose the cops and secure your payment.
Dispatch II
In this mission, you are tasked with taking out a FIB agent that has pried too much into Martin Madrazo’s drug cartel monopoly. In fact, they’re determined to put the narcotrafficker down by buying evidential records off some Merryweather mercenaries who plan to meet him at the Merryweather Headquarters in Elysian Island.
Although a long drive, you must make your way to the Island and infiltrate the facility however you like. You can take a boat and dock in from the southern end of the headquarters, or take the more brute force approach and bust right in.
However you choose to proceed with the infiltration, the main objective is to interrupt the meeting happening upstairs and kill the FIB agent. Of course, after you do something as incredible as that, the entire place will be on high alert, so I’d recommend making a swift exit by hijacking a Valkyrie helicopter towards the southern end.
Dispatch III
In this mission, Martin has assigned you to kill an associate translator that the International Affairs Agency has taken in for a black project (a top-secret, usually illegal job that the perpetrator is not charged for). However, letting someone close to him roam around under someone else’s supervision is a huge no-no for Martin – thus, his intent to kill the translator.
The black project is taking place in another country, which is why the translator is flying out on an armored plane at the Los Santos International Airport. With the majority of the police force ensuring that the man’s departure goes smoothly, you must make your way into the associated hangar and take him out.
I would recommend taking this one slow and stealthy due to the ultra-tight level of security presence. On top of that, feel free to steal and escape in one of the available jets when losing the cops because, trust me, that wanted level will skyrocket after the deed is done!
Dispatch IV
In this mission, you’ll be taking out one of Martin’s dealings on his own order. But why? Turns out that one of his dealers double-crossed him for a favorable relationship with the Vagos, who he’s meeting later during the night at the Recycling Plant in Le Puerta.
In comparison to the scale of the previous dispatch services you’ve given, this one is not so bad and can easily be accomplished with just two well-synchronized players. I would recommend walking into the facility and taking out Vagos henchmen by headshotting them with a suppressed weapon.
In the event that you see two henchmen talking to one another, simply headshot one while your duo headshots the other simultaneously – no one will be alerted this way. Once the dealer has been assassinated, make your way out the same way you came in – no special helicopters or anything special is needed.
Dispatch V
While a decent level of synchronization will easily get you through Dispatch IV, the requirement goes up significantly in this contract mission. Unlike other missions, five targets need to be assassinated, all of which are dangerous people in cahoots with one another.
However, according to Martin’s trustworthy intel, all five are currently separate and laying low before regrouping for their next big score – now’s the time to strike!
In order to facilitate your mission, Martin once again flexes his money and provides you with two helicopters: a Buzzard (unarmed, sadly) located at the end of Mount Haan Drive and a Maverick located in the Vinewood Racetrack. I would recommend splitting up, preferably in pairs (a total of four players) and swiftly taking out each target one by one.
Another reason why you should split up is that a 7-minute timer will start after the first target is killed – if you don’t kill the rest within this real-time time frame, the targets will regroup, and the mission will fail. The targets are located at the following locations:
- Normandy Drive, Vinewood Hills
- Meteor Street, Alta
- Top of the Richards Majestic skyscraper
- Top of the Mile High Club skyscraper
- Moving through Little Seoul on a Sultan R5
Dispatch VI

The final dispatch mission is a little anticlimactic in my opinion, and is nowhere as thrilling as the previous one, even though it initially comes off as somewhere more. At first, it seems like a multi-target mission as Martin briefs you on taking care of some police officers that he corrupted but were being transferred by the International Affairs Agency. However, as soon as you make your way to the marker on the map, you are greeted with all of your targets at the same place.
To elaborate, the number of targets will vary depending on how many players are in your party – one target per player is the principle here. Although they’ll be getting transported in their own armored trucks, all of the trucks will be moving as a collective under the protection of a Police Cruiser – much like a group of sheep following a shepherd.
With all of your targets in one place, all you need to do is either blow up the trucks or pry open the backdoor and open fire on the targets within. Of course, once you’ve eliminated the target, the cops aren’t going to let you off scot-free, so you’ll have to lose them by any means necessary.
The Cayo Pierco Heist
The Cayo Pierco Heist is a much bigger treasure of content in comparison to Martin Madrazo’s contract missions – it’s a grand heist, after all! But where does it all start?
Martin Madrazo is a giant cartel leader, and it’s no surprise that his network of connections extends far beyond the country. While much of his drugs are produced locally, he also sources some from foreign suppliers in order to stem any local competition. One such supplier is a Columbian narcotrafficker named Juan Strickler, more famously known as El Rubio.
As I mentioned at the start of this guide, self-interest is a major trait of GTA V’s villains. This very thing led El Rubio to blackmail Martin into negotiating prices over the cost of leaking some highly sensitive information.
We know Martin can silence witnesses, but if someone equal to him in power threatens to rat him out, his best bet is to destroy any evidence against him. That’s exactly what he tells his son Miguel Madrazo to do, invoking him to hire you, the protagonist, for the job!
You can read more about the specifics of this exciting heist in our Cayo Pierco guide!