
- GTA V Chop Guide - January 8, 2023
- Pegassi Infernus Guide - January 6, 2023
- Dinka Blista Kanjo Guide - January 6, 2023
Grand Theft Auto V is no stranger to a black market economy that flourishes in the underworld of Los Santos, with big and small gangs competing fiercely. Of course, no one plays nice around these parts, and things can get out of hand quite quickly – I’m talking full-fledged firefights going down in the streets with zero regards for bystanders.
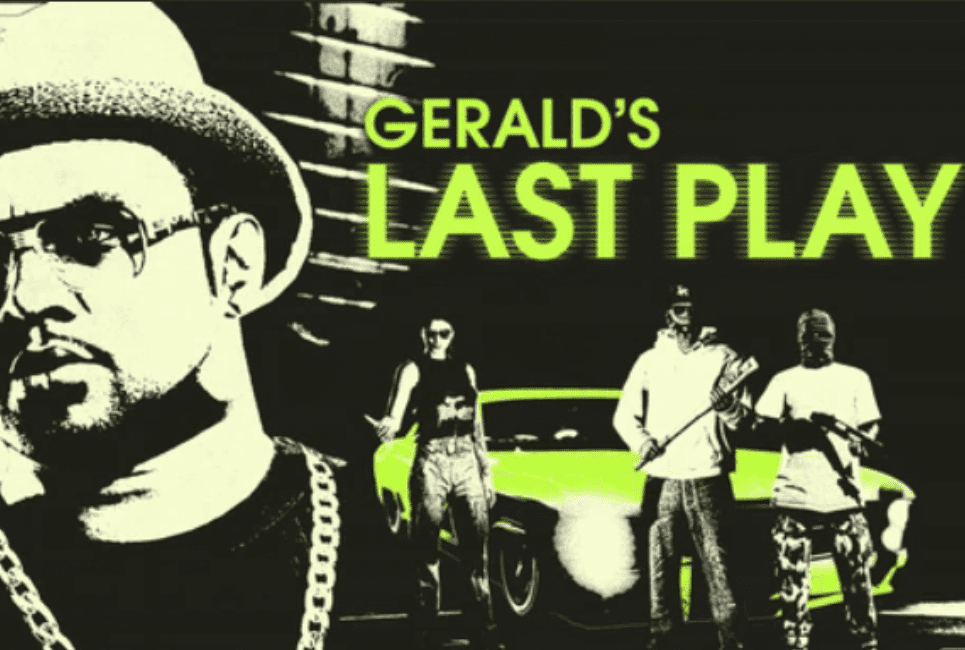
That’s exactly what happened in the April of 2020, as Rockstar teased the Gerald’s Last Play Week event with the highlight that:
“Gerald and The Families have encountered some unwelcome resistance from rival gangs, and like any enterprising entrepreneur, Gerald’s been planning his escape strategy.”
Welcome to a Gerald’s Last Play Guide.
Gerald’s Last Play Overview
The Gerald’s Last Play DLC is centered around Gerald’s ambitions to make one giant score before swiftly exiting the underworld. After all, an entrepreneur like him wouldn’t want to stick around long enough before feuds turned into bloodbaths – “profit off the situation and get the heck out” is his strategy here. But how exactly does he plan on doing that? That’s where you, the reliable protagonist, come into play.
Gerald’s strategy involves staking everything over a profitable transaction involving his possessions and some that he plans to steal from other gangs by any means necessary. Furthermore, he also plans on settling the score with some rival gang bosses before making his getaway. His entire scheme is very ambitious, especially for a character who is just a mission-giver in GTA Online – but that’s also what makes it exciting, wouldn’t you agree?
Gerald’s strategy pans out throughout six contract missions, all of which play out differently, varying in difficulty, fun, and payout. In this guide, I’ll be going over each of the six missions in the order that I believe you should play them, all while keeping up with the chronological progression of the DLC’s story.
To start any of the six contract missions, you must head to Gerald’s place, indicated by a “G” symbol on the Los Santos map. Here, you’ll see a yellow interaction circle; upon entering, you’ll be taken to the DLC’s menu – you can activate all six missions.
Make Ends Meet

This mission involves stealing a Chinese recipe from a rival gang boss while simultaneously clearing out the boss and his accomplices. As you may have guessed, these are the Los Santos Triads, the same Chinese gang operating under Wei Cheng in story mode. However, what will probably surprise you is that the mission’s target location is Raven Slaughterhouse over at Cypress Flats – this is where Micheal was held hostage in the Fresh Meat mission.
Enter Raven Slaughterhouse
The trip to the Slaughterhouse is not that long, but be ready for a shootout the moment you reach the Triad’s turf. Two “slangers,” as Gerald likes to call them, will be standing guard outside the premises and will be caught off guard upon your arrival – swiftly take them out in order to avoid any alerts and make your way inside.
Go to the Safe
The cookbook that Gerald’s after is hidden deep inside the Slaughterhouse, locked away inside a safe. Unlike some safes in the game that can be blown up, this one, in particular, requires to be cracked legitimately – how exciting! While there is no solid indication of its location on the map, all you need to focus on is gunning down the enemies in front of you.
Excluding the two enemies you encounter as you enter the establishment, there are three rooms of Triads you must sweep before the safe presents itself to you. Fret not, for there is plenty of cover in these rooms, and as long as you’re playing at a manageable difficulty, you should be good – I recall using a little ol’ Uzi to get the job done.
Crack the Safe

Cracking the safe is a relatively challenging task as it requires some level of trial and error – as such, depending on how lucky you are, you could spend quite a bit of time on it. Thus, before proceeding with the safe cracking process, I’d recommend putting down any nearby enemies to avoid interruptions. After all, safe cracking requires concentration!
Cracking the safe involves bypassing three different locks, all on the same knob numbered 0 to 90 in intervals of 10. To unlock the first lock, you must rotate the knob either clockwise or anticlockwise until you reach the point of maximum vibration. After that, the second lock will prompt you to rotate anticlockwise until you find the end of maximum vibration.
Bear in mind that only if you unlock the first lock correctly will you actually be able to rotate the knob counterclockwise for the second lock. The same principle is applied to the third lock, which asks you to rotate the knob counterclockwise until you reach the point of maximum vibration. Overall, getting all three points right in a single go will open up the safe.
Take Out the Gang Boss
After cracking the safe and stealing the Chinese recipe inside, you’re practically done, right? No, because Gerald is clever – instead of letting the gang boss get off scot-free only to exact vengeance in the future, he tells you to kill him and suppress any enemy grudges. Thus, you’re supposed to tread forward into the Slaughterhouse rather than backtracking to your car.
A handful of henchmen will stand between you and the gang boss, but by the time you’re done with them, the boss will have made a run for it. With that said, make sure your car is parked nearby or hijack a nearby car to chase down the gang boss – you have the liberty to kill him however you want, be my guest.
Regroup at Gerald’s Apartment
With the gang boss dead, the mission comes to a close as you deliver the cookbook to Gerald back at his apartment. There is no cutscene, unfortunately, and simply parking your or stepping inside the yellow interaction circle outside his place will trigger the mission’s completion.
Bad Companies

While “Make Ends Meet” is a mix of action and some safe cracking, the safe cracking being the highlight of the mission, I’d say “Bad Companies” is simply packed with pure, unadulterated action. This mission is centered around narrowing down the location of the boss of Marabunta Grande, a Salvadoran gang that first appeared during the infamous Father/Son mission in Story Mode. According to Gerald, the boss can be smoked out by taking out several Salva hideouts, after which all that remains is to kill him however you want to.
Take Out the Salva Henchmen
Upon taking up the mission from Gerald’s place, your minimap is immediately updated with four different locations, each signifying a Salva hideout: Vespucci Beach, Morningwood, Downtown Vinewood, and La Mesa. You are supposed to clear out each hideout one by one, leaving zero survivors behind to move on to the next part of the mission.
It’s important to note that each location has a different layout of enemies, so don’t go around anticipating the same kinds of shootouts at each site. Some are naturally more challenging than others, requiring you to climb up ladders to reach enemies on higher ground.
Take Out the Salva Gang Boss

After clearing out the four Salva meetup locations, it will be revealed that the gang boss is hiding out at the Alta Construction Site by Alta Street. This is a location famous for being the meeting point between you and Devin Weston in Story Mode’s “I Fought the Law…” mission. However, instead of being the ‘peace and quiet’ location we’re all familiar with, it is swarming with Salva henchmen who are out to protect their precious boss this time.
As far as the scale of the shootout goes, it is definitely the biggest you’ll ever see in this mission. With enemies posted on the ground, you are supposed to kill your way up to the first construction platform and tear through the Salva pack surrounding its leader. After that, the gang boss won’t be particularly hard to take out and will be as vulnerable as his deceased henchmen – good luck, soldier!
Take a Photo of the Salva Gang Boss
Once the deed is done, your last objective is to take a photo of the dead gang boss and send it to Gerald as proof of the mission’s completion – as I said, Gerald is a clever guy. After that, simply exit the construction site as prompted, and the mission will come to a swift close.
Go Figure

For me, “Go Figure” is perhaps the least eventful contract mission in the DLC. Although it involves some degree of action, the major emphasis is on finding particular items in a general area. As such, even though the first run of the mission is time-consuming, it is quite farmable in the long run because item locations stay the same across different playthroughs of the mission. With that said, the mission’s payout is actually pretty solid when it all adds up.
Go to Little Seoul
After dealing with the Triads and Salvadorans, this mission takes you on a trip to the Korean neighborhood of Little Seoul, right next to Vespucci. Here, you are supposed to find and hijack a Gang Burrito van carrying coke-containing action figures – these are essentially Impotent Rage figurines stuffed with cocaine. Although underhanded, the business model is admittedly quite impressive – as such, Gerald intends to steal a solid sample of the product and sell the idea to a client.
Search for the Van
While finding the van in the highlighted general area (an underground parking lot) is not that hard, getting to the van is challenging as gang members of Kkangpae heavily guard it. The shootout is not a walk in the park either, as there isnt’ much cover available aside from a few cars and columns to keep the parking lot from collapsing.
If you’re well-equipped with heavy artillery, then be my guest and go in there guns blazing – but if you want to take your time and play the stealth game, Gerald isn’t against the idea either. All in all, the point is to take out the enemies and hijack the black carrier van without blowing it up, or else the valuable contents inside will go up in flames.
Go to the University of Los Santos
In order to make as much profit as possible off the transaction, Gerald wishes to collect as many coke-containing action figures as he can, apart from the van you just hijacked. As such, through some inside information, he learns that the van you just took over had come back from delivery over at the University of Los Santos – you know what that means? It’s time to “refund” that delivery and get back the action figures.
There are a total of seven figurines you must collect at the University:
- One can be found on one of the disarrayed chairs in the middle of the garden
- One can be found in the Chihuahua Hotdogs stall towards the campus’s exterior
- One can be found on the sheltered bench right next to the “ULSA” signboard
- One can be found near the left tall bush (shaped like an inverted cone) located just outside one of the building doors
- One can be found above the large garbage bin against the yellow walled compound
- One can be found on the Tennis Ball Launcher on one of the Tennis courts
- One can be found near the generators on top of the small compound right next to the Tennis courts (it does require vaulting over a pile of parcels to get to)
Go to Mirror Park

After collecting all seven action figures, Gerald learns of another batch that was just delivered near Mirror Park. He tells you to steal those as well, as the place is not that far away from your location. However, do bear in mind that you must prevent the van from blowing up, all the more because the Koreans will be coming after you from here on out!
There are a total of seven figurines you must collect at the location:
- One can be found on top of the red container stacked on the large blue THRIFTEX container
- One can be found just behind the Proposition208 billboard (which requires vaulting over the aforementioned containers)
- One can be found near the spiky bush up the stairs of the red-colored cafe
- One can be found near the fallen-over trash bin in the middle of the street
- One can be found on the other side of the street, near a charred van exterior (close to a parked red Compact)
- One can be found in the Saloon on the other side of the street
- One can be just above the Better Oral dental clinic (it does require vaulting over the stall beneath)
Deliver the Van to Gerald’s Apartment
With all 14 figurines collected on top of the hijacked van, all that’s left to do is to deliver the van to Gerald. However, you’re not out of the mud yet as the Kkangpae are still on your trial and will chase you in their blue sedans until either you die, or the van gets disabled. So, take my advice and, instead of fighting them off, make a beeline for Gerald’s apartment as quickly and smoothly as possible – you’ll lose the gang members in no time!
Deal With It

The “Deal With It” mission is rather interesting, with a spicy plot twist that genuinely got me excited the first time I played it. How would you envision it playing out if I told you that the mission involved the Ballas and the Los Santos Police? That’s how intriguing the mission’s plot twist is!
Go to the Drug Deal
Gerald gets word that some of his drug stashes have been stolen by the Ballas, who intend to sell them off to a certain client. However, Gerald, being the clever man that he is, has had tracking devices installed on those stashes and is, thus, able to pinpoint the drug deal’s location at Elysian Island. As such, he instructs you to head over there as soon as possible and interrupt the drug deal while recovering all that is his.
Search the Crates for the Drugs
Of course, don’t expect to be welcomed warmly at Elysian Island as it is going to be swarming with Ballas henchmen. While the objective will tell you to search the crates at the dock in order to recover the stash, the Ballas aren’t simply going to sit back and watch you do that. Hence, I’d recommend clearing out the place first before proceeding with the objective.
The firefight is easier than most Ballas shootouts as there is plenty of cover available for you and less for them – some will funnily be shooting at you way out in the open.
Go to the Buyer’s Location
After clearing out the Ballas, you’ll soon find out that all four crates are empty as you begin to search through them. This doesn’t make any sense, right? Gerald panics on the phone as he learns of this and infers that the tracking devices were used to bait him out, perhaps to stall the actual deal going down at an unknown location.
Gerald scrambles through his information brokers and digs out information on any other drug deal going down nearby. After catching a whiff of one such deal in Southern Los Santos, Gerald urges you to check it out immediately to confirm if it involves his drug stashes.
Destroy the Evidence
After arriving at the general location of the drug deal, scoping out the area just a little bit will reveal that there aren’t any buyers around here – instead, you’ll be pleasantly surprised by the Los Santos Police Department. What in the world are they doing here? Turns out that the actual drug deal was, in fact, going down here, but someone snitched on the Ballas, and the police ended up storming the area to confiscate the transaction.
Unfortunately, since you fell for the tracking device bait, too much time was lost, and the confiscation was said and done by the time you reached the area. Furthermore, it is only a matter of time before they trace the drugs back to Gerald, putting his last play and you at risk of grave danger. However, Gerald is quick to act, and as hard as it is for him to order this, he tells you to destroy the stashes since it’s too late to recover them now.
Lose the Cops
Different points on the minimap will be generated, pointing to all of Gerald’s stashes. You are supposed to destroy them by any means necessary, which requires killing some cops in the process. In the end, even if you decimate the evidence, you’ll still have a three-star wanted level and will need to lose it before the mission gets cleared.
This mission is a good example of how complications can arise even when you have the most elaborate plans. In the worst-case scenario, these complications can call for sacrifices, and Gerald, being the strong-willed man he is, can go through with that to save his own skin.
Fast Peddling

With the loss of drugs in the foregoing mission, it’s no surprise to see Gerald trying to make up for his loss by stealing drugs from other gangs. Moreover, at the same time, he’s got beef to settle with factions of The Lost Motorcycle Club, a gang that has persisted since GTA IV. As such, he tells you to hit four of their drug-producing locations and leave with no survivors left behind – two birds with one stone!
This is my favorite mission out of the six contract missions because it has it all: intense shootouts, chasing sequences, and close combat inside prominent locations many people have never seen before.
Steal the drugs
There are a total of four locations you are required to steal drugs from:
- A Meth Laboratory in Clinton Avenue, Downtown Vinewood
- A Weed Farm in Hanger Way, Cypress Flat
- A Cargo Warehouse in El Rancho Boulevard, El Burro Heights
- A Cocaine Lockup in Bay City Avenue, Vespucci Canals
There are three different kinds of action that you will experience at each of these locations. Firstly, henchmen will be posted outside the premises, guarding the place – you will have to go through them before breaking into the establishment. Once in the establishment, there will be a different interior layout depending on the kind of place you are in. For instance, the Weed Farm has a lot of weeds growing inside of it, and enemies will be hiding behind them to catch you off guard. Adapt and overcome them!
Lastly, after stealing the first stash of drugs, the Lost bikers will come after you for the rest of the mission. They will try their hardest to obstruct you with their bikes and Glocks, but how good is a bike in front of a car, am I right? Feel free to ignore them and deal with them when you stop at one of four drug locations, or run them over and given them a taste of their own medicine!
Regroup at Gerald’s Apartment
Once you’ve stolen all four drug packages and cleared out any bikers relentlessly pursuing your trial, it’s time to deliver the booty over at Gerald’s place. This could take time, depending on where you make your last stop. As such, I would recommend hitting the four drug locations in the following order: Cocaine Lockup > Meth Laboratory > Cargo Warehouse > Weed Farm
End Product

With Gerald stocked up on all kinds of expensive merchandise, it’s finally time to sell off the stock and get filthy rich! However, even though the DLC is nearing its end, Rockstar has one last challenge in store for you, which is perhaps the hardest you’ll ever face. In fact, a lot of fans (myself included) believe the developers made the “End Product” mission so hard that it became a source of frustration and annoyance instead of fun. All in all, that’s for you to decide – I formed my opinion based on my first impression of the mission.
Go to the Deal Location
Upon activating the mission, a Mule Custom spawns outside Gerald’s apartment, that’s fully loaded up with his stock. Your task, as such, is to deliver this truck to the buyer’s location over at either Pillbox Hill or Del Perro – there is an equally likely chance of getting assigned either location, though it doesn’t take change the mission’s difficulty.
As soon as you arrive at said location, you’ll notice that Gerald’s buyers aren’t there yet, to which he will reassure you that they are on their way. Of course, even I started to suspect the situation at this time – I’ve messed with so many of Gerald’s enemies over the past several missions; surely they won’t let this all play out smoothly. Just as I had started to entertain such doubtful thoughts, the Ballas pulled up on me in waves…
Protect the Mule Custom
With the transaction location compromised, Gerald tells you to hold off the Ballas and protect the Mule Custom while he redirects his buyers to a safer location. Even so, the question remains: how did the Ballas figure out the transaction location? Gerald works alone mostly, so getting snitched on is very unlikely – my best bet is that they’ve been keeping tabs on him since the previous mission, waiting to steal back the drugs plus some more in one fell swoop.
The Ballas’ determination truly shows as they surround the area and begin raining bullets on you from all directions and elevations. Some will be shooting at you, while others will be targetting the Mule Custom – if you bring too much attention to yourself, you may get overwhelmed, but if you pull back even for a second, the truck will be in danger. Such is the difficulty of this mission.
With the limited number of covers available, you should only try taking on the waves of enemies if you have enough firepower, ammunition, and confidence. However, objectively speaking, you’re better off bringing an armored car to the battle and picking off the enemy, one-by-one, from inside of it while also covering the Mule Custom from several angles.
Go to the New Location
Once you’ve miraculously cleared out the waves of Ballas henchmen, Gerald will hit you up about the new transaction location over at Elysian Island – but the challenge isn’t over yet. As you make your way to the buyer’s location on the Mule Custom (which, mind you, is a very slow vehicle), the Ballas will try their best to sabotage the delivery with their purple SUVs.
Stepping out of the truck and fighting off the Ballas is discouraged as the enemies keep spawning until you reach Elysian Island. So, keep treading onwards, dodging any incoming cars, and head straight for the marked location to complete the mission and DLC, by extension.
FAQs
Question: How Do I Bring My Armored Car to the “End Product” Mission?
Answer: Before taking the Mule Custom over to the buyer’s location, have your armored car parked nearby. Then, get out of the Mule Custom and enter your car to place it inside the center of the highlighted region (good power position) before parking the truck closely behind it. You’re good to go!
Question: Does Higher Difficulty Affect the Payout?
Answer: Yes, of course! Rockstar made sure to reward more challenging runs of these missions. You get paid 25% more on normal and 50% more on hard difficulties.
Question: What Is the Most Farmable Contract Mission?
Answer: While many believe the “Fast Peddling” contract mission is the quickest to complete if you take the shortest route and are equipped with high firepower, I would still argue that “Go Figure” secures more money in the long run. All you need to do is memorize the locations of all the action figures, and you’ll be speedrunning it in 10 minutes or less!
Conclusion
Ultimately, once you have completed all six contract missions, Gerald’s Last Play DLC comes to a close with a sweet payout that’s monumental for beginners.
If you’re new to GTA Online and want to make some quick bucks through less boring tasks, then these six contract missions should give you a great headstart towards fulfilling your virtual yet material wants.
Continue reading related GTA Mission Guides: